
Charming Bag Charms
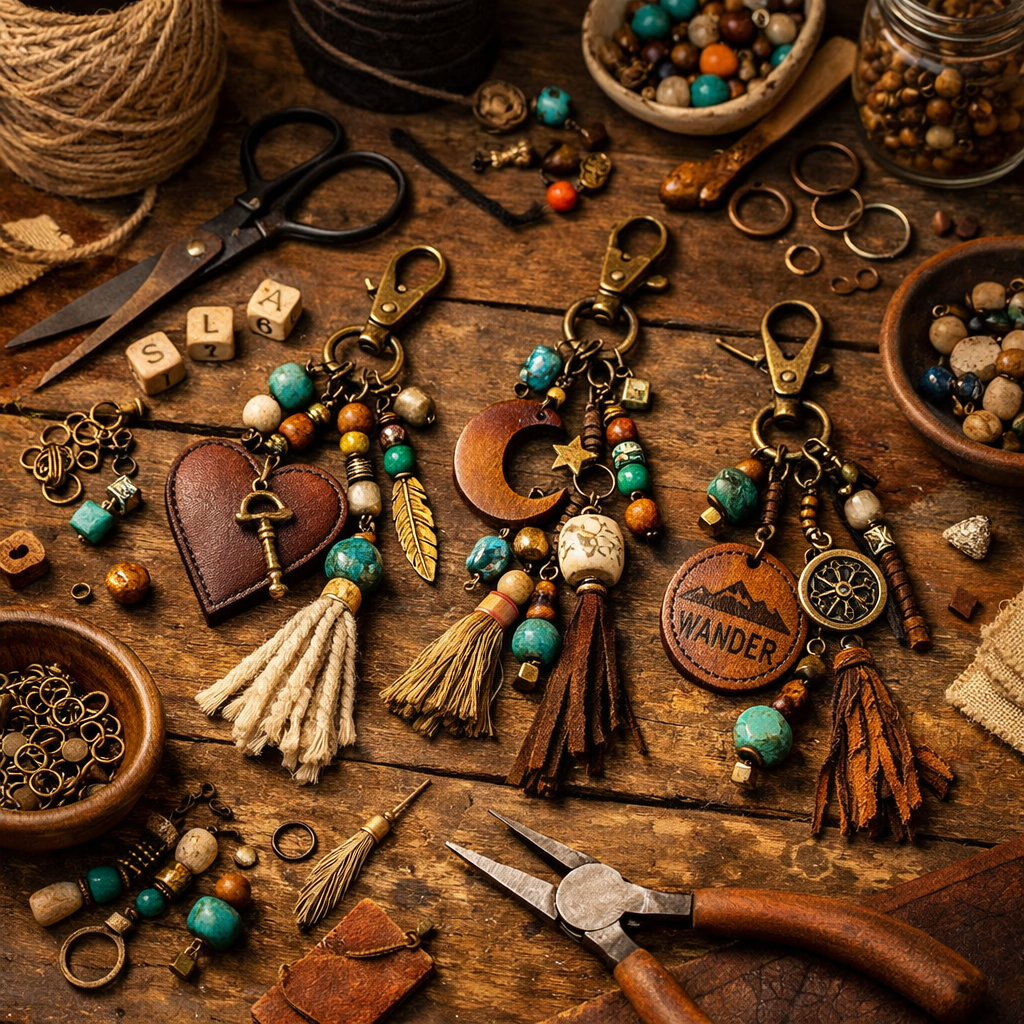
Bag charms are hand-decorated accessories strung on cord or metal bars that hang from tote bags, backpacks, and zippers. You can create them in two ways: threading beads onto a cord for a classic strand charm, or stringing beads onto a pre-made keychain bar for a quicker build. No sewing or special tools required.
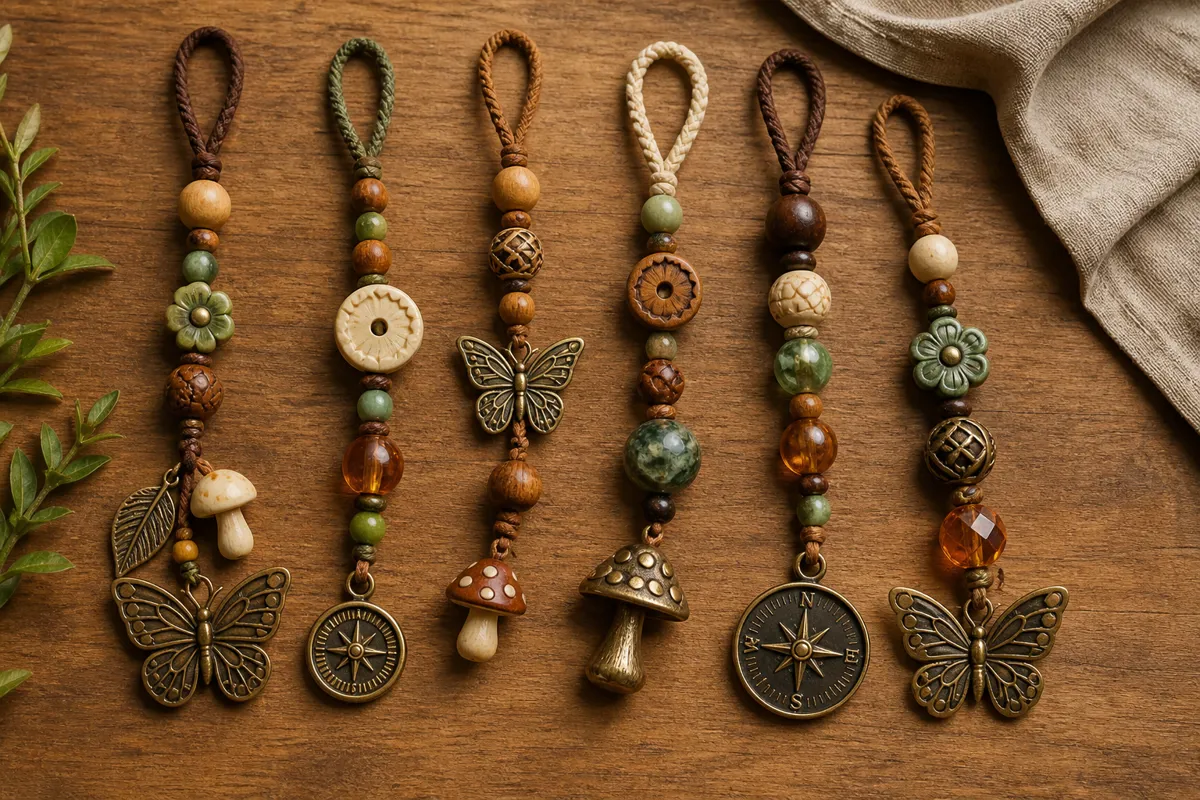
What supplies do I need to make bag charms?
Every item links to a real Amazon product so you can order everything in one shot.
Essential Supplies
- Cord or string: Satin rattail cord, macrame cotton cord, or elastic beading string
- Beads: Wood beads, glass beads, acrylic beads, or clay beads in assorted sizes (4–12 mm)
- Pendants / charms: Buttons, metal filigree pieces, small resin shapes (mushrooms, leaves, butterflies)
- Jump rings or split rings: Small brass or nickel-open rings for attaching pendants
- Scissors or wire cutters
- Super glue or E6000 (optional, for securing knots)
Recommended Starter Kits
If you'd prefer everything in one box, the kits below include beads, cords, and findings all together:
MYCUTEY 421-Piece DIY Bag Charm Kit
Includes colorful beads, cords, alphabet charms, flower/star pendants, and packaging bags. $23.99
View on AmazonLUSTEMBER 4-Roll Elastic Beading String
1 mm stretchy cord—black and white, 55 yards per roll. $9.99
View on AmazonANEZUS Satin Rattail Cord (1.5 mm)
Silky, 120-yard roll. Perfect for a clean, finished look. $6.99
View on AmazonTOHONGADON 618-Piece Beaded Keychain Kit
338 letter beads, heart/star beads, colorful accent beads, ropes, and hardware. $25.99 $21.99
What are the two main styles of bag charms?
We'll walk through two approaches so you can pick the style that matches your bag and skill level. Both are beginner-friendly, and each takes about 15–20 minutes to complete.
How do I make a classic beaded-strand charm?
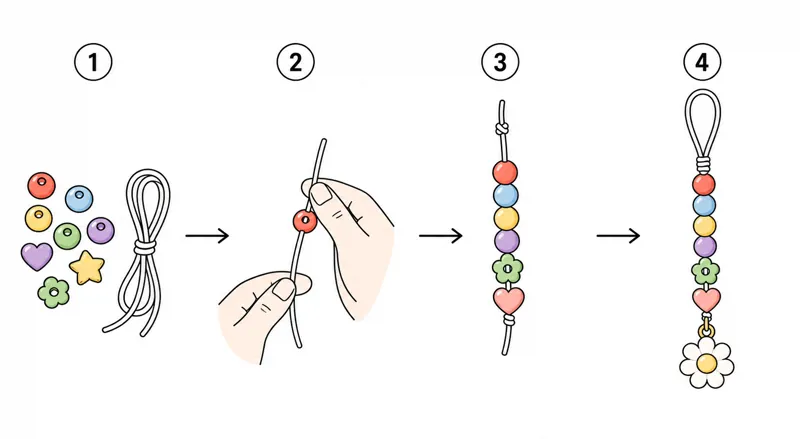
This is the simplest entry point. You thread beads onto a cord, add a charm at the bottom, and finish with a loop at the top. The result is elegant, lightweight, and works on any zipper pull or bag handle.
Step 1 — Cut Your Cord
Measure and cut a length of cord approximately 18–22 inches (45–55 cm) long. Longer cords give you more room to experiment with bead placement before tying off. If you're using satin rattail cord, use scissors or a small pair of wire cutters to get a clean edge. If you're using elastic string, simply snip—it doesn't fray.
Step 2 — Thread Your First Bead
Starting at one end of the cord, thread your largest or most decorative bead first. This will become the bottom pendant of your charm. A large decorative button, a carved wooden bead, or a resin mushroom shape works beautifully here. Push it about halfway down the cord so you have room above it for smaller accent beads.
Step 3 — Add Your Bead Sequence
Now build your pattern. Here are a few tried-and-true sequences:
- Boho earth-tone: Large wooden bead → small glass bead → spacer bead → medium wood bead → small glass bead
- Color-blocked: Three amber beads → one clear crystal bead → three sage-green beads → one tiger-eye bead
- Mixed texture: Smooth acrylic bead → matte clay bead → faceted glass bead → metal spacer ring → repeating the sequence twice
The key is to alternate sizes and textures so the charm has visual rhythm. Place your most eye-catching bead or pendant at the very bottom—this is what people will see when the charm hangs from your bag.
Step 4 — Secure the Top Beads
Once your bead arrangement looks right, leave about 2–3 inches (5–7.5 cm) of cord above your topmost bead. This remaining length becomes your hanging loop. Thread a small spacer bead or crimp bead onto the cord just above your last decorative bead to prevent beads from sliding down.
Step 5 — Tie the Loop
Take the two loose ends of cord above your top spacer bead and tie a double overhand knot tightly against the spacer. Pull it snug—this knot anchors all your beads. If you're using satin cord or a slippery material, dab a tiny dot of super glue or E6000 on the knot for insurance. Let it dry for 30 seconds.
Step 6 — Form the Hanging Loop
Fold the knotted end back on itself to create a small loop (about ½ inch wide). Pass the two loose tail ends through this loop and pull tight—a lark's head knot. This creates a sturdy loop that slides over zipper pulls, bag handles, or purse straps. Trim the excess tails flush with the knot if you prefer a clean look, or leave them for a fringe effect.
How do I make a parsed-keychain charm?
This version uses a pre-made keychain bar (often called a "beadable keychain") as the base. The metal bar has a built-in ring at the top and a flat bar you string beads onto. It's the fastest way to go from zero to finished charm—perfect for making several charms as gifts or for a coordinated set.
Step 1 — Get a Beadable Keychain Bar
These are simple metal bars with a ring attached. Search Amazon for "beadable keychain bars" and you'll find multi-packs for under $10. The Huwena 6-Pack (6 pcs) is a popular choice at $7.99.
Step 2 — String Your Beads
Slide your chosen beads directly onto the metal bar, starting from the ring end. Use a mix of sizes—small spacer beads near the top, then gradually larger beads toward the bottom. Finish with a statement pendant or charm at the lowest point. The bar keeps everything aligned neatly, so you won't have to worry about beads twisting.
Step 3 — Add a Dangle Charm (Optional)
For extra flair, attach a small metal charm or pendant to the bottom of your bead sequence using a jump ring. A filigree butterfly, a tiny mushroom, a crescent moon, or a leaf shape adds dimension. Use small-nose pliers to gently open the jump ring, slip it through the bead or a small connecting ring on your charm, and close it back.
Step 4 — Attach to Your Bag
Simply clip the ring at the top of the keychain bar onto your bag's zipper pull, D-ring, or handle. Done.
What seasonal and themed charm ideas work best?
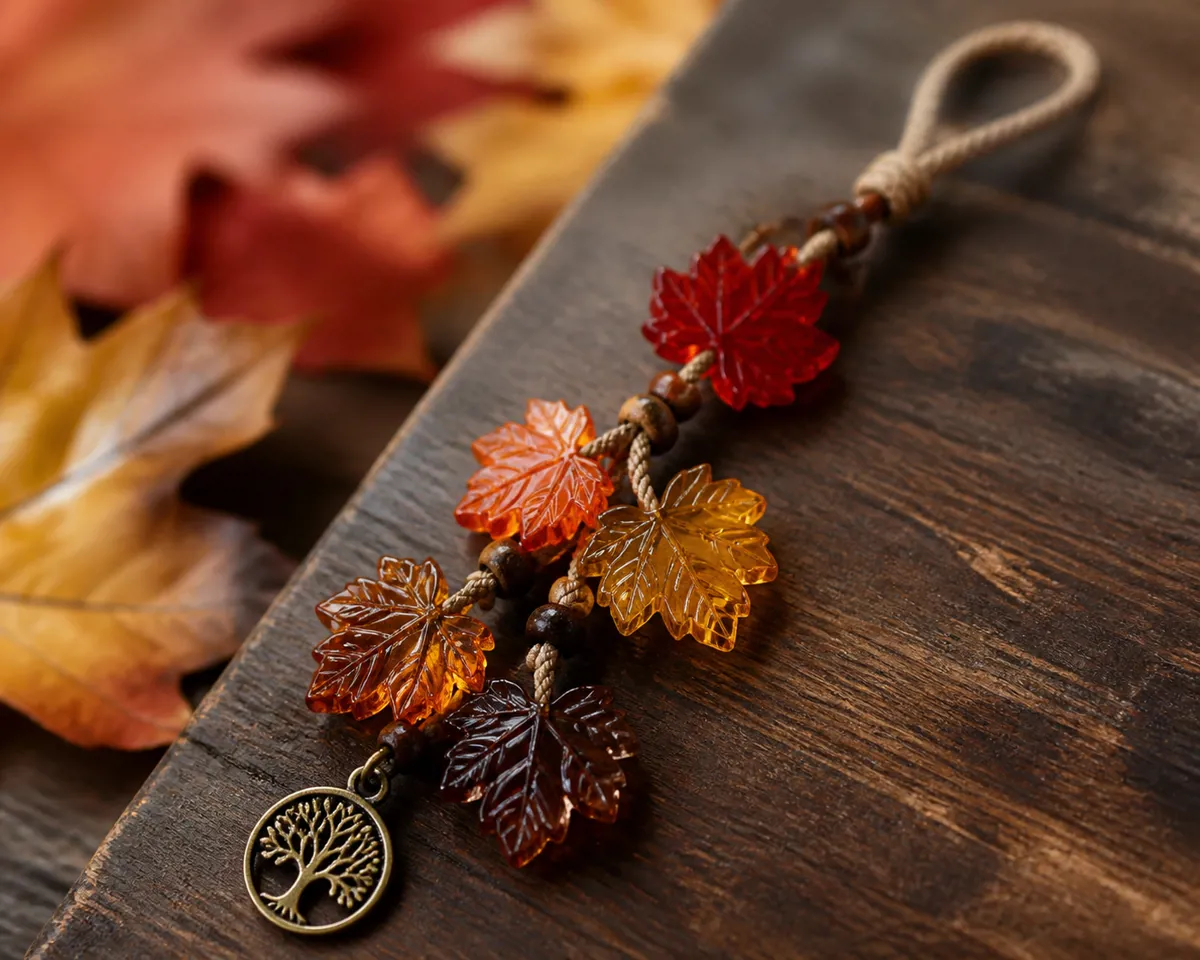
One of the best parts of bag charm crafting is the ability to match your accessory to the season, holiday, or mood. Themed charms make standout gifts and are easy to replicate in sets.
Fall / Autumn Theme
Autumn-themed charms are a crowd favorite. FQYN 100-Piece Maple Leaf Glass Beads (mixed autumnal colors, ~$9.99) are a standout option—delicate, realistic leaf shapes in warm reds, oranges, and golds that string easily onto any cord for an instant seasonal charm. Pair them with wooden beads and in a bronze-tone metal leaf pendant for a cohesive fall look.
Spring / Summer Theme
Sea-glass beads, pastel acrylic flowers, and small shell pendants create a breezy, coastal vibe. Add a touch of turquoise or coral for brightness against lighter bags.
Winter / Holiday Theme
Dark woods, silver spacers, and tiny snowflake or star charms evoke a crisp, festive feel. Red and green glass beads work well for Christmas-specific charms.
Everyday / Minimalist Theme
For a clean, understated look, stick to a single bead type—uniform wooden beads or matte ceramic spheres in one color—with a single small metal charm. Less is more.
How do I design polished bag charms?
Color Theory
Stick to a palette of 3–4 coordinating colors maximum. Analogous colors (greens, yellows, browns) feel organic; complementary pairs (blue + orange, purple + yellow) create striking contrast.
Texture Play
Mix smooth glass beads with rough wood, glossy acrylic with matte ceramic, and add at least one metal element. Texture variety makes a charm feel intentional rather than random.
Weight Balance
Keep the heaviest element at the bottom. A top-heavy charm will twist and flop. If your pendant is heavy, add 2–3 smaller beads above it to counterbalance.
Length Matters
A 16–20 inch total length works best for most bags. Shorter charms (under 14 inches) sit neatly on front pockets; longer ones (22+ inches) drape dramatically on tote handles.
Knot Security
Always double-knot or use a surgeon's knot. For satin or slippery cords, a tiny drop of clear-drying glue on the knot prevents unraveling over time.
Theme It
Match charms to seasons or moods—autumn leaves and acorn beads in fall, sea-glass and shell charms in summer, dark woods and silver for winter. Themes make sets feel cohesive.
How do beaded-strand charms compare to keychain-bar charms?
| Feature | Beaded Strand Charm | Keychain-Bar Charm |
|---|---|---|
| Difficulty | Beginner | Very Easy |
| Time to Complete | 15–20 min | 10–15 min |
| Cost per Charm | $1–$3 | $1–$4 |
| Customization Level | High (full freedom) | Medium (bar constrains layout) |
| Durability | Good (depends on knot quality) | Excellent (metal bar is rigid) |
| Best For | Gifts, themed sets, artistic expression | Quick projects, uniform matching sets |
| Tools Needed | Scissors only | Scissors + small pliers (optional) |
Frequently Asked Questions
Acrylic and wood beads are the most forgiving. They have larger holes that thread easily, they're lightweight so knots hold securely, and they come in affordable bulk packs. Glass beads are beautiful but can be slippery and heavier—save those for your second or third charm once you're comfortable with the technique.
Absolutely. Bag charms work on any fabric bag with a zipper or handle. For backpacks, attach to the front zipper pull or the side water-bottle pocket cinch cord. Paracord-style charms also work great clipped onto backpack shoulder straps.
Insert small metal spacer beads or tiny flat disc beads between harder materials like glass or metal and softer materials like wood or acrylic. Spacers act as buffers and also add visual polish. Most bead kits include spacers—check the contents of your kit first.
A properly tied double overhand or surgeon's knot on elastic or satin cord is very secure. For extra peace of mind, apply a microscopic dot of clear-drying craft glue (like E6000 or Gem-Tac) directly on the knot before trimming. This locks it in place permanently without affecting the look.
Satin rattail cord gives the most refined finish—it has a subtle sheen and lays flat against the bag. Cotton macrame cord offers a more rustic, bohemian feel. Elastic string is the most beginner-friendly because you don't need to worry about the cord slipping as you work. Choose based on the aesthetic you want: polished (satin), rustic (cotton), or easy (elastic).
What should I take away from this guide?
Bag charms are one of those crafts that reward repetition—the first one might take 20 minutes, the fifth might take 5. The skills transfer directly: measuring cord, choosing a color story, tying a secure knot, and balancing weight. Once you've mastered the basics, you'll start seeing bead combinations everywhere and your charms will develop their own distinct style.
Start with a single-bead strand charm using a starter kit from Amazon, then branch out into layered designs, themed sets, or keychain-bar constructions. The supplies are cheap, the learning curve is gentle, and the finished product is something you actually get to use every day.
Ready to start? Browse the full selection of bag charm supplies on Amazon here: Browse Bag Charm Supplies on Amazon




0 comments